Imagine a world where your kitchen is always stocked with fresh, aromatic garlic, grown right in your own backyard. It's not a dream! Growing your own garlic is surprisingly simple, deeply rewarding, and incredibly self-sufficient. Far from a one-time effort, garlic offers the unique opportunity to cultivate your own seed stock year after year, allowing it to continually adapt and thrive in your specific garden conditions. This guide will walk you through the essential steps on how to plant and harvest garlic, transforming you into a confident garlic grower.
Why Cultivate Your Own Garlic?
There's a special satisfaction that comes from plucking produce from your garden and bringing it straight to your plate. With garlic, that satisfaction is compounded by the knowledge that you're creating a sustainable cycle. Once you invest in quality seed garlic, you rarely need to buy it again for planting. Each year, you'll reserve a portion of your best bulbs to replant, ensuring a continuous, custom-adapted supply. This not only saves money but also guarantees you fresh, chemical-free garlic with a flavor profile often superior to store-bought varieties.
Furthermore, growing your own allows you to experiment with unique varieties not typically found in supermarkets. You'll discover nuances in flavor, size, and storage capabilities, enriching your culinary adventures and connecting you more deeply with your food source.
Choosing the Right Garlic Type for Your Climate
The first and arguably most crucial decision when starting your garlic growing journey is selecting the right type for your environment. This choice will impact everything from its winter hardiness to its flavor and storage potential. Remember, once you commit to a type, you can cultivate your own seed stock for a lifetime!
Garlic primarily falls into two main categories:
Hardneck Garlic
- Characteristics: Hardneck garlic is easily identified by its stiff, central stem (the "hard neck") which sends up a distinctive flower stalk called a "garlic scape." The cloves typically form a single ring around this central stem. Flavor is often described as more complex and robust.
- Climate Suitability: This type excels in colder climates with harsh winters, as it's incredibly winter-hardy. It's ideal for northern gardeners where other garlic types might struggle to survive the dormant winter period.
- Scapes: A delightful bonus! Garlic scapes emerge about a month before harvest and are edible. They have a milder garlic flavor and can be used in stir-fries, pesto, or grilled.
- Storage: Generally, hardneck garlic doesn't store quite as long as softneck varieties, typically lasting 4-6 months under optimal conditions.
- Popular Varieties: Rocambole, Purple Stripe, Porcelain.
Softneck Garlic
- Characteristics: Lacking a hard central stem, softneck garlic has a pliable neck, allowing for traditional braiding for storage. It typically produces more cloves per bulb, arranged in multiple rings, but does not produce a scape. Its flavor is generally milder than hardneck.
- Climate Suitability: Softneck garlic is better suited for warmer climates with milder winters, though some varieties can adapt to cooler zones.
- Storage: This is where softneck garlic shines! It boasts an excellent shelf life, often storing for 6-9 months or even longer, especially when properly cured and braided.
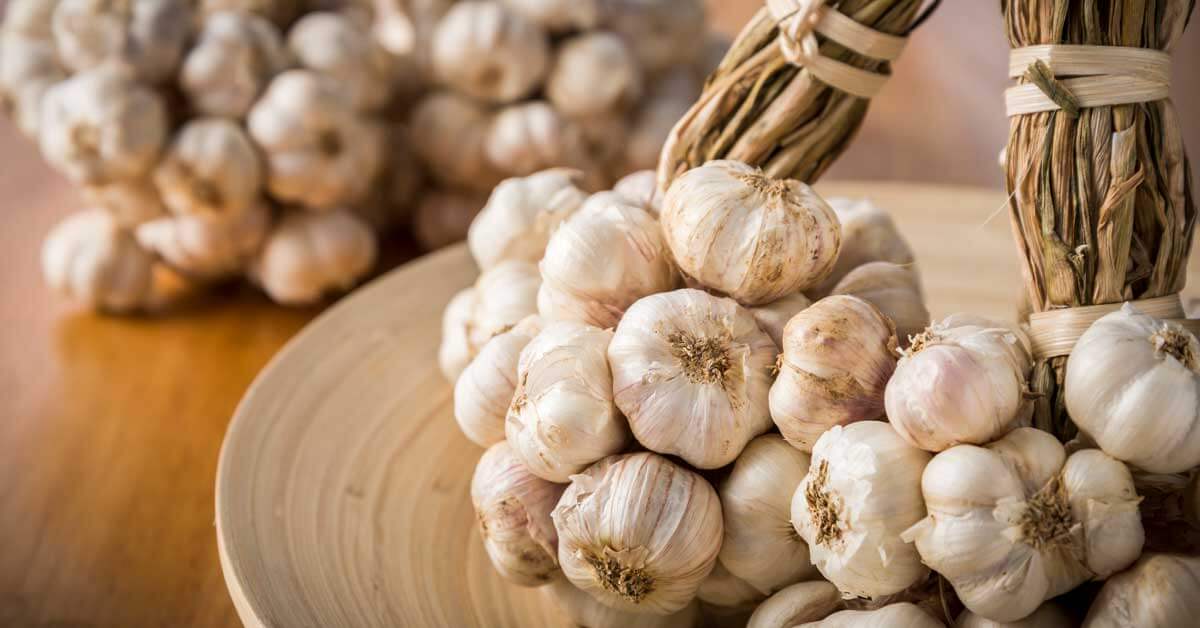
- Braiding: The flexible stems make it perfect for braiding, which can be an attractive and practical storage method.
- Popular Varieties: Artichoke, Silverskin.
Elephant Garlic
- Characteristics: While botanically closer to a leek than true garlic, Elephant garlic offers immense, mild-flavored cloves. It does produce a scape.
- Climate Suitability: Similar to softneck garlic, it prefers milder climates.
- Flavor Profile: Very mild, almost onion-like, making it a favorite for those who find regular garlic too pungent.
- Storage: Stores moderately well, but usually not as long as softneck.
For a deeper dive into which type is best for your specific growing zone, check out our detailed guide: Hardneck vs. Softneck: Choosing the Right Garlic for Your Climate.
Sourcing Quality Seed Garlic
Resist the urge to plant garlic from the grocery store! While tempting, supermarket garlic is often treated with sprout inhibitors to extend shelf life, making it unsuitable for planting. Its origin and variety are also usually unknown, meaning it might not be adapted to your local climate or carry diseases. For a successful harvest, always opt for dedicated "seed garlic."
Where to buy true seed garlic:
- Reputable Seed Suppliers: Online and local garden centers are excellent sources. They offer a wide selection of varieties, ensuring you get disease-free, viable cloves.
- Local Farmer's Markets: This is a fantastic option! Locally grown organic garlic is often ideal because it's already adapted to your climate and less likely to be treated. Always ask the farmer about the variety and growing practices.
Picking the right seed garlic is paramount to avoiding common pitfalls. Learn more about making the best choices in our article: Garlic Planting Secrets: Picking Seed & Avoiding Common Mistakes.
Preparing Your Garden for Planting
Garlic isn't too demanding, but it does have a few preferences that, when met, lead to robust, healthy bulbs.
Optimal Planting Time
Garlic is a fall-planted crop in most temperate climates. The ideal window is typically 4-6 weeks before the first hard frost, allowing the cloves to establish a root system before the ground freezes solid. This period of dormancy over winter is crucial for stimulating bulb formation in the spring.
Location and Soil Requirements
- Full Sun: Choose a spot in your garden that receives at least 6-8 hours of direct sunlight daily.
- Well-Drained Soil: Garlic absolutely detests "wet feet" and will rot in waterlogged conditions. If your soil is heavy clay, amend it generously with organic matter.
- Fertile Soil: Garlic is a moderate to heavy feeder. Enrich your soil with plenty of well-rotted compost or aged manure. This provides essential nutrients and improves soil structure.
- Soil pH: Aim for a soil pH between 6.0 and 7.0 (slightly acidic to neutral). A soil test can confirm your current pH and guide any necessary amendments.
The Step-by-Step Guide: How to Plant and Harvest Garlic
Planting Garlic Cloves
- Prepare the Cloves: Just before planting, carefully break apart your garlic bulbs into individual cloves. Select the largest, healthiest cloves for planting, as these will produce the biggest bulbs. Leave the papery skin intact.
- Planting Depth and Spacing: Plant cloves 2-4 inches deep (deeper for colder climates) with the pointed end facing up and the flat, basal plate (where the roots emerge) facing down. Space cloves 4-6 inches apart in rows, with rows 12-18 inches apart.
- Watering and Mulching: After planting, water thoroughly. Then, apply a generous layer (4-6 inches) of organic mulch like straw, chopped leaves, or wood chips. This insulation protects the cloves from extreme winter cold, conserves moisture, and suppresses weeds.
Ongoing Care and Maintenance
- Winter Dormancy: Your garlic will largely sleep through the winter. Don't be alarmed if a few green shoots emerge if you have a mild spell; they will typically survive.
- Spring Growth: In early spring, the shoots will vigorously emerge. Once you see significant green growth, you can top-dress with a balanced organic fertilizer or more compost.
- Watering: Garlic needs consistent moisture, especially during its active growth phase in spring and early summer when the bulbs are swelling. Aim for about 1 inch of water per week, either from rain or irrigation. Reduce watering as harvest approaches to prevent rot and encourage curing.
- Weeding: Keep the area around your garlic beds free of weeds, as they compete for nutrients and water. Mulch helps immensely with weed suppression.
- Scapes (Hardneck varieties only): For hardneck varieties, scapes will emerge in late spring/early summer. While beautiful, cutting the scape will redirect the plant's energy into bulb development, leading to larger bulbs. Harvest scapes when they form a curl, before they stiffen. Enjoy them in your kitchen!
When and How to Harvest Garlic
Knowing exactly how to plant and harvest garlic at the right time is key to maximizing both size and storage potential.
- Timing is Everything: Garlic is typically ready for harvest in mid to late summer, often 8-9 months after fall planting.
- Signs of Readiness: Look for the bottom 3-4 leaves to turn yellow or brown and dry out, while the top 4-5 leaves are still green. This indicates the plant is redirecting energy into the bulb. If you wait too long, the wrappers protecting the cloves can split, leading to poorer storage. If you harvest too early, the bulbs will be smaller and not fully developed.
- Harvesting Method: Resist pulling the plants by their stems, as this can break the neck or damage the bulb. Instead, use a garden fork to gently loosen the soil around the bulb. Dig several inches away from the stem to avoid piercing the bulb, then carefully lift it from the ground.
- Curing Your Harvest: Curing is a critical step for proper storage. Shake off excess dirt, but do NOT wash the bulbs. Leave the roots and stems intact. Bundle 5-10 bulbs together or spread them out in a single layer in a warm, dry, well-ventilated area, out of direct sunlight. A shed, garage, or covered porch works well. Cure for 2-4 weeks until the wrappers are papery dry and the neck is tight and firm.
Storing Your Garlic
Once cured, trim the roots (leaving about 1/2 inch) and cut the stems about 1-2 inches above the bulb (for hardnecks) or braid them (for softnecks). Store your cured garlic in a cool (50-60°F / 10-15°C), dark, and well-ventilated place. Do not store in the refrigerator, as this can trigger sprouting.
Growing your own garlic is an incredibly rewarding journey that offers fresh, flavorful produce year after year. From selecting the perfect type for your climate to the satisfying process of planting, nurturing, and finally harvesting your bountiful crop, each step brings you closer to garden self-sufficiency. Embrace the annual cycle, save your best cloves for next season, and enjoy the unparalleled taste of home-grown garlic in all your culinary creations!
